Hooked On Sunshine Blankets

I’ve been making Hooked On Sunshine Blankets this year having joined the group quite some time ago. Nessa’s patterns are absolutely beautiful, intricate designs that are written so well even I figure it out through brain fog eventually! I hadn’t blogged for a while so I figured I’d show you all what I’ve been up to.

Atlanticus

To start with I made the Atlanticus for Izzy, she loved the pattern and knew what colours she wanted. I’ve made blankets before but never this complicated and stunning. I did doubt myself ever finishing this but somehow I did in just a few weeks too!

Liliana

Next I made the Liliana for the lovely and very pink celebrant Berni! She was so patient even though this blanket took me a little longer than the Atlanticus and so appreciative when I was done it really gave me a boost in confidence.

Phoenix

My third HOS was the Phoenix for the very talented author and one of my besties, Fiona Morgan. She’s had quite a rough time being hit by covid and some personal issues that I wanted to make something really special as a (late 😅) housewarming gift.

Thankfully Crochet UK had the perfect yarn for a Phoenix blanket and I couldn’t wait to get started. This took me a little longer than the last two blankets, mostly because summer holidays with two kids is hard work. But I eventually got there and then decided to delay further by making a bolster cushion to go with it haha!

For (the sake of it)

While waiting for materials to finish the cushion my fingers got a little antsy and I already had the For pattern ready to go and some lovely cotton yarn I really wanted to try out. I sat reading the notes as always and like the idea being that we always crochet For something/someone but me being me decide this was the blanket I wanted to make For the sake of it.

My mental health has been wobbly, with my past and my chronic pain battling for headspace I’ve felt too guilty to do things just for the sake of it. I have so much encouragement from the Mr, family and friends to just rest or do something for me so I decided alongside braving the therapy that my For the sake of it was going to be exactly that for as and when I just fancy crocheting for the enjoyment of it. No deadlines, nobody in mind to gift it to. When it’s done I may well gift it but until then it is just For the sake of it.

I decided to do something I don’t often do and just let it do it’s own thing changing colours naturally too. Normally because the yarn had short colour changes unlike the yarn for the Phoenix I would worry it looked messy. So far I’m at round –  and can’t wait to see the finished piece when I can buy more yarn in the new year!

Setting Up Relentlessly Crocheted

I began setting up Relentlessly Crocheted as a Facebook and Instagram page earlier this year. This was mentioned a little in my post about picking back up last week. I love to crochet and my confidence is slowly growing thanks to friends and family. There are a few things I still need to work on to get the business up and running fully.

Setting up relentlessly crocheted

Postage and Packaging

There is so much to research when it comes to setting up selling crochet. Postage and packaging are up there as the most important, alongside yarn costs for pricing items correctly. I also want to make sure my items arrive quickly, safely and packed in an eco-friendly way.

packaging - crop man sealing carton box with tape
Photo by Karolina Grabowska on Pexels.com

The weight and size of items can vary wildly so I’ve been looking at different styles of boxes for packaging. I also want to find some eco-friendly postal bags for things such as blankets. I’ve been sending gifts to friends to help work out these costs. I very quickly learnt not working out postage costs correctly will eat any profit from the sale otherwise.

Yarn Costs

The little yarn hut

I’ve been very lucky to find the Little Yarn Hut in Orsett which stocks some beautiful yarns at reasonable prices! If orders were to pick up I would need to look at wholesale prices though. This would help bring the costs down further, for now I’m more than happy to stick to the yarn hut. Jo who runs it is absolutely lovely, full of advice and ideas every time!

Crochet Is My Therapy

Crochet really is my therapy, I can rest yet still feel useful which is great for my anxious little brain! I’ve lost count of how many items I’ve made! There is quite a variety so far and love a challenge, I’m always asking people for ideas. With the help of friends and family I realised there is potential there for me to have a small business. I’m still in the early days of setting things up and relying mostly on gifting friends to work things out.

Relentlessly Crocheted Makes

I’ve impressed myself at times and been frustrated but I am learning I can take most things on. This year was definitely not the year to commit fully to setting up a small business. Instead I plan to share with my readers my plans, makes and journey as I continue setting up Relentlessly Crocheted.

More makes by relentlessly crocheted

Whilst I am not yet set up I am happy to take on orders where possible so do give me an email or message on social media. If you have any helpful tips of ideas that may make setting up Relentlessly Crocheted then please get in touch too.

Skull Scarf – Free Crochet Pattern

I’ve altered a Skull Scarf free crochet pattern that I found by Nadelwork on Ravelry. The original narrow skull scarf pattern is beautiful, however, it wasn’t eating enough yarn.

Skull Scarf - Free Pattern 
Purple to grey crocheted skull scarf. Each side has 3 skulls broken up with blocks of double croche

I have a beautiful purple to grey Ice yarn, my lovely friend, Sarah bought me last year that I wanted to use up fully. I decided to make some simple alterations which make it more of yarn eating scarf.

Skull Scarf Free Crochet Pattern

This pattern is lovely and simple, mostly using chains, single crochet (SC) and double crochet (DC) stitches. The scarf is worked in two halves and sewn together at the end.

Skull Scarf - Free Pattern

I chose 3 skulls at the bottom of each half as these will be on display when worn, with a simple block of DC between them to break the pattern up but you can decide how many you would prefer to add.

(Make 2)

Chain 46

Row 1: Chain 2, DC in 3rd chain from hook, DC to the end of the row.

Row 2 – 10: Turn, Chain 2, DC to the end of the row.

(From the original pattern)

Row 11: Chain 4, 4 DC in the space, chain 2, 4 DC in the space, chain 9, skip one space, 4 DC in the next space, chain 2, 4 DC in the space, Chain 2, DC.

Row 12: Chain 2, 3DC in the space, chain 2, 4 DC in the space, chain 2, 4 DC in the space, chain 6, 4 SC around the chain, chain 6, 4 DC in the space, chain 2, 4 DC in space, Chain 2, 4 DC in space.

Row 13: Chain 4, 4 DC in space, chain 2, 4 DC in space, chain 6. (worked on the 4 SC from the previous row to make the teeth) 1 DC, chain 1, 1 DC, chain 1, 1 DC, chain 1, 1 DC, chain 6, 4 DC in the space, chain 2, 4 DC in the space, chain 2, 1 DC.

Row 14: Chain 2, 3 DC in the space, chain 2, 4 DC in the space, chain 8, 11 SC in the skull. (2 around the chain, 1 in the DC, 1 around the chain, 1 in the DC, 1 around the chain, 1 in the DC, 1 around the chain, 1 in the DC, 2 around the chain) Chain 8, 4 DC in the space, Chain 2, 4 DC in the space.

Row 15: Chain 4, 4 DC in space, chain 10, 4 SC (On the last 4 SC of the 11 SC from previous row), chain 5 (This will be the nose). Skip 3 stitches, 4 SC (On the first 4 SC from the 11 SC from the previous row). Turn now Chain 10, 1 SC around the chain 5, chain 10 and slip stitch in the very first SC of this row. (You just made the arches of the eyes!) Turn again, 10 SC around each arch (20 in total), slip stitch into the 8th SC in this row. Chain 10, 4 DC in the space, chain 2, 1 DC.

Row 16: Chain 2, 3 DC in the space, chain 2, 4 DC in the space, chain 10, 16 slip stitches on the eyes of the skull. (Count 8 from the middle to balance your stitches). Chain 8, 4 DC in the space, chain 2, 4 DC in the space.

Row 17: Chain 4, 4 DC in the space, chain 2, 4 DC in the space, chain 6 12 SC on skull (again count 6 from the middle), chain 6, 4 DC in the space, chain 2, 4 DC in the space, chain 2, 1 DC.

Row 18: Chain 2, 3 DC in the space, chain 2, 4 DC in the space, chain 2, 4 DC in the space, chain 6, 8 SC on on the skull, chain 6, 4 DC in the space, chain 2, 4 DC in the space, chain 2, 4 DC in the space.

Row 19: Chain 4, 4 DC in the space, chain 2, 4 DC in the space, chain 2, 4 DC in the space, chain 6, 6 SC on the skull, chain 6, 4DC in the space, chain 2, 4 DC in the space, chain 2, 4 DC in the space, chain 2, 1 DC.

Row 20: Chain 2, 3 DC in the space, chain 2, 4 DC in the space, chain 2, 4 DC in the space, chain 2, 4 DC in the space, chain 6, 4 DC in the space, chain 2, 4 DC in the space, chain 2, 4 DC in the space, chain 2, 4 DC in the space.

Row 21: Chain 4, 4 DC in the space, chain 2, 4 DC in the space, chain 2, 4 DC in the space, chain 2, 4 DC in the space, chain 2, 4 DC in the space, chain 2, 4 DC in the space, chain 2, 4 DC in the space, chain 2, 1 DC.

Rows 22-32: Turn, Chain 2, DC to the end of the row.

Repeat Rows 11- 32 for a second skull and continue this repeat until you have the amount of skulls you are happy with. (I chose 3 each side).

I then continued with 46 rows of DC to use up my ICE yarn, leaving just enough to sew the two halves together. Add as many rows as you feel is necessary for the correct length.

This is a really fun pattern and the added rows of DC help speed it along and eat more yarn. With autumn just around the corner, it’s the perfect time to crochet a beautiful skull scarf.

This pattern is free to use, you may sell finished items but please do credit myself and Nadelwork (on Ravelry) and do not sell the pattern on.

If you’ve used the pattern feel free to tag me in your photo’s.

Crocheted Jesus, Donkey And Grumpy Care Bear

I’ve Crocheted Jesus, his faithful Donkey (as Eva calls him) and a Grumpy Care Bear over the last month. I’m now so close to completing my 10 Crochet Projects for 2019! With just Dobby (who I’ve started), a blanket and an aeroplane left to make.

Crocheted Jesus, Donkey And Grumpy Care Bear

Crocheted Jesus

I really enjoyed making a crocheted Jesus for Martyn, I learnt several things whilst crocheting him. This is one of the first patterns I’ve followed where I’ve had to try out the popcorn stitch. It turns out this stitch is really simple and great for making toes! You can find the pattern here if you’d like to try it too.

Using Popcorn stitch for toes

I also learnt the weft method for creating Jesus’ hair. This is a fairly simple process but takes a little time. Once all strands are split, you can then use an iron or straighteners to smooth out the kinks.

Weft Method

I was impressed with how quickly Jesus came together to be honest. He looked fairly tricky but it didn’t take long. I added some craft wire inside his arms, legs and body so Martyn has a poseable Jesus haha!

Crocheted Jesus

Donkey

Next up was a Donkey, again for Martyn, after all, Jesus needs his faithful donkey (according to Eva!). This pattern was really simple and I didn’t stress at all over this make.

Donkey Head

Crocheting the donkey gave me a little confidence boost. It wasn’t that long ago I could barely hold a hook correctly and now I can make a perfect little donkey head!

Crocheted Donkey

I think Donkey turned out pretty well for a first attempt. I can see one or two small tweaks I could make but overall, I am really happy with him! His tail is pretty cool too.

Crocheted Donkey Side on

Grumpy Care Bear

It’s safe to say Grumpy Care Bear has been one of my biggest challenges yet. The pattern didn’t quite seem to match up, I’m not sure if I was reading it wrong and unfortunately the pattern seller hasn’t replied. I decided to try a few changes and managed to work it out in the end.

Crocheted Grumpy Care Bear

I don’t get on too well when it comes to cutting and sticking felt or sewing details on. What looked like lovely hearts and raindrops ended up looking a little blob-like. Sewing is definitely not my forte but I am determined to improve with time.

Crocheted Grumpy care Bear

Poor Grumpy Care Bear looks a little traumatised, he’s obviously seen things no Care Bear should ever see! Whilst the detail was a bit of a fail, I’m pleased he at least looks like a bear. I guess we all have to start somewhere.

Whilst Grumpy was a little tricky, I’m still really enjoying all these crochet projects! I currently have Dobby’s head and body made and a few other projects I’ll share soon as my list has extended quite a bit. My yarn stash has grown quite rapidly so I should be able to keep myself busy.

Have you crocheted anything lately? What do you think of my latest makes?

Crochet Learn It. Love It. Book Review

I received Crochet Learn It. Love It. By Tracey Todhunter to review. As most of my readers already know I love crochet, so I couldn’t wait to review this book. I have to say before I explain any further, if you are looking for a comprehensive beginners guide to crochet then this is definitely it!

Crochet Learn It. Love It

Crochet Learn It. Love It.

The book contains a mix of essential crochet skills, patterns, tricks and tips to ease you into a life of learning and loving crochet!

Chapter 1 – Essential Skills

Essential Skills covers everything you need to know starting with different yarn types and weight. I was pleased to see a Ball Band explanation, something I haven’t seen anywhere else before. With different types of hooks available, basic accessories and even luxury accessories explained, any beginner is sure to feel knowledgeable.

Essential Crochet Skills

This handy book shows you all the essentials from holding and tensioning the yarn via various methods. It also shows you how to hold the hook, make a slip knot, foundation chain, count chains, work into chains and fasten off. All explained in great detail, accompanied by photos making it easy for any beginner to learn Crochet.

Basic Stitches

There is a great guide to basic stitches which will help you get started on most projects. To make this easier there is a full explanation on how to understand crochet stitches to help you make sense of your work and pick up on any mistakes, a huge help for any beginner. I remember looking at my first crochet attempts and having no idea what I was looking at or if it was correct. This book puts your mind at ease as you learn making it much more enjoyable.

Basic Stitches

Confidence Building

Crochet Learn It. Love It makes reading patterns and charts a breeze and explains measuring AND adjusting your tension! From joining yarn to working neat stripes, stripes with a difference and shaping your work, you’ll feel like a pro in no time.

You’ll find yourself knowing how to finish your work, different blocking methods, tapestry needle stitches, crocheted, slip stitch and conceal crocheted seams enhancing your work. I’ve been crocheting at least 2 years now and I had already learned so much from this book, without even passing this first section!

Quick Start Projects

There are several quick start projects throughout the book. These consist of quick and easy patterns which require little yarn. Each project states the finished size and tension along with the items you’ll need. These are items such as yarns, crochet hook sizes, yarn needles, buttons etc.

There is also a list of abbreviations and techniques used in the pattern along with the page no within the book to help you with stitches. Following pattern notes you can find the pattern itself with photo’s to guide you. Compared to other crochet books I’ve read I genuinely felt that I could try each project. This would have been perfect when I first started out. With such great explanations and notes you are filled with confidence to complete each project. I’ll definitely be making a few of these once I’m done with my current Crochet Projects!

Chapter 2 – Working In The Round

Working In The Round

Moving on to the second section you quickly learn how to work in the round. Learn the foundation ring, magic ring and finger wrap methods to start. This section will quickly show you how to crochet circles and spirals along with a gorgeous ‘sun in the center’ pattern to show off your new crochet skills!

Sun In Circle

Blocks and motifs are great for making various pieces and are also worked in the round. This books explains how to make a plain granny square block, granny motif, granny triangles and granny hexagons. These are useful from cushion covers, blankets, cardigans and more. You will also learn to crochet a circle or flower in a square. There’s a lovely pattern at the end of this section for a granny square cushion similar to the one I recently made too.

Granny Triangle

I love granny squares as they are nice and easy but I decided to try a granny triangle for the first time. I found the pattern easy to follow and can now tick it off my list of things to learn!

Granny Triangle

Learning tubular crochet can make things quite fun. Luckily this book makes it simple to learn with some fab patterns to go with it! This handy guide makes crocheting a beanie or Amigurumi fox a piece of cake

Chapter 3 -Stitch Patterns

Stitch variations really can change crochet, from working into just a front or back loop, extended stitches and alternate loops, this book covers it all. This is something I hadn’t found in my other books either and Tracey Todhunter explains it all so well.

Stitch Patterns

I was surprised to find so many beautiful stitches and patterns to go with each stitch enabling you to create impressive crocheted pieces instantly! It really is quite an extensive list for a beginners guide and will no doubt make falling in love much easier.

Chapter 4 – Finishing Touches

Finishing touches such as buttons, holes, edging stitches and more are explained in great details with some fantastic techniques shared. Whether finishing crochet work or adding a touch of crochet to a pillowcase or similar, you can use these finishing touches to pretty up just about anything!

Finishing Touches

Each section is bursting with enough crochet knowledge that you feel confident taking on new projects. I may not be a complete beginner but I still learned a good few tips and stitches. The patterns throughout are simple to follow and will have you falling in love with crochet in no time!

Chapter 5 – Taking Your Skills Further

The Final chapter shows you a few more advanced skills such as tunisian, broomstick and hairpin crochet. I will be attempting the Tunisian at some point as this guide looks much easier than other’s I’ve looked at. Detailed step by step photos with explanations make each technique seem doable.

Taking Your Skills Further

A Fantastic Guide To Crochet

Honestly, Crochet Learn It. Love It. is a fantastic guide to crochet and makes it so easy to learn, you really will love it! You can learn so much from this fab little book and I know I’ll be using it for reference in future. There are a good few stitches in the book I’ve yet to try. I can’t wait to speed through my current projects and try them.

Second Crochet Project Update

Here’s a second crochet project update, you can read the last one here. I set myself a goal of 10 projects to complete this year and have been working my way through them quicker than I thought I would.

Second Crochet Project Update

Second Crochet Project Update

I’ve managed another 2 projects on the Crochet To-do list leaving just 6 left. Thankfully a second list has begun as I can’t see this keeping me occupied all year after all, haha!

Cushion

Admittedly the ‘Cushion for me’ was actually for Martyn! I wanted to make it as a surprise using some of his mums left over wool he gave me at Christmas. I didn’t use a pattern thinking a simple granny square design would suffice. I’ve never made a cushion before but decided to just give it a go.

Granny square cushion

I used blues as it is Martyn’s colour, particularly the middle and grey goes quite nicely in between. As I was using scraps I had to work out a pattern before I started. I made the squares as two pieces then stitched them together leaving one side open to insert the cushion.

Blue and Grey Granny Square Cushion

I was quite impressed with my stitching on this cushion. I added a short panel on one side like on pillow cases so the base of the cushion didn’t poke out. I then added two star buttons to help keep it shut. This means the cover can be taken off to wash and dry.

Unicorn For Izzy

Next I started on a Unicorn for Izzy. I used a pattern for this but with Izzy’s guidance we changed a few things!

The pieces were all quite easy to make. Although my stitching still needs a little improvement with Amigurumi patterns it went together quite easily!

Crochet unicorn

It didn’t take long at all to stitch everything together and see a unicorn slowly appear.

Unicorn with legs

Apart from the glitter wool (never again! Ouch) I quite enjoyed making Izzy’s unicorn. Although I did get a little bored making so many curlicues.

Crochet Unicorn

Luckily Izzy decided we needed less curlicues and rather than two rows all the way down the head she opted to spread them out more like hair. Phew!

Crochet Unicorn

Next Make

I decided my next make will be the Grumpy care bear for Hannah as I have all the yarn I need for it and it looks like another quick make!

Crochet Projects Update 1

A Crochet Projects update was needed this week as I’ve been pretty busy! Izzy has been quite poorly this week so I’ve spent a lot of time cuddled up with her. She’s been fairly sleep but clingy so we’ve been watching a film and I’ve sneaked in some crocheting.

Crochet Projects Update 1

Crochet Projects Update – First Make

I started off with a blue Tulip for Checka, a fairly quick make. The pattern was quite easy to follow too. This was the first time I was adding a stem and then sewing a leaf onto it.

Originally, I thought it would be much trickier, especially the sewing. I was quite pleased with the results in the end I noticed an improvement in my tension and sewing. I was hoping setting myself 10 crochet projects would help me improve and learn more and so far it seems to be working well.

Second Make

Having completed the Tulip I decided to make the pig next. Checka’s daughter, Autumn, is quite poorly with Shingles and bored having a few weeks off school/ I thought it might cheer her up so I posted it off today.

Never having made an animal before I was excited to see how I got on and to order more crochet supplies and to see how safety eyes worked too. Having found a pattern Autumn was happy with, we made a few tweaks to create Piggy Jr. Autumn already has a Piggy and wanted a son for him so we decided to make a blue dummy too!

I didn’t quite get his ears right so he has a bit of a Dobby the house elf look about him. He also seems to have inherited my Scoliosis and even curves to the left like me! We love Piggy Jr though even with his imperfections.

Current Make

Unicorn Head

Izzy has also been rather poorly this week so I have begun making her unicorn. So far the head is complete and I am about to begin the body. I needed more stuffing though so I ordered 2 bags and a few more yarn colours so I can start the Donkey, Jesus for Martyn and the Grumpy Care Bear for Hannah next.

10 Crochet Projects For 2019

I’ve got 10 Crochet projects I want to complete throughout 2019. I set myself 6 goals this year and one is to continue learning to crochet. I figured the best way to ensure that happens is to set myself 10 Crochet Projects for 2019.

10 crochet projects for 2019

My confidence has grown a lot over the last year when it comes to crochet. I’ve stopped panicking it’s beyond me and giving most patterns a go, knowing if I mess up I can simply start again.

10 Crochet Projects

1. A Tulip – This is for Checka as she kindly bought me new crochet hooks enabling me to crochet easier and with less pain!

2. Grumpy Care Bear – This is for Hannah as she loves Care Bears and when I spotted the patterns I just knew I had to try and make one for her.

3. A blanket – There are so many gorgeous patterns though, it’s going to be tough to pick one.

4. Dobby – Eva loves Harry Potter and she loves Dobby, I want to make her a Dobby of her own and a mini sock to go with him.

5. A cushion – This will be for me, our sofa is horribly uncomfortable so a few extra cushions should help and keep me busy.

6. A unicorn – OK maybe a few of mini unicorns for my girls and one for one of Checka’s daughters too.

7. A pig – Another one for Checka as one of her daughters loves pigs!

8. An aeroplane – I spotted a pattern for an aeroplane and love it. I want to create more items for boys and the first will go to Checka’s little boy.

9. Jesus – Martyn’s choice, I’ve yet to attempt people so this will be a fun challenge!

10. Finally, a Donkey – Again for Martyn as he loves them.

A Fun Challenge

I’m really looking forward to challenging myself over the coming year with my 10 crochet goals. Crochet has become quite a comfort for me, on my bad days I can still feel like I’m achieving something. Each make on the list is different and different levels of difficulty and I know I’ll learn a lot along the way.

If I finish all 10 projects with time to spare then I’ll probably try to fit a few more in too!

Do you have any crochet goals this year?

Part 2 – Purple Crocheted Summer Cardigan

Part 2 of my Purple Crocheted Summer Cardigan is finally here! Yes, that’s right, after far too long, I finally finished! You may remember Part 1 when Ritohobby kindly sent me some of their gorgeous Infinity Hearts Rose 8/4 yearn to create this cardigan with. 

Purple Crocheted Summer Caridgan Using Ritohobby Yarn

What Took Me So Long?

I loved this project so much but being a much thinner yarn and using the purple 3mm hook began to cause excruciating hand pain. After just 5 minutes of crocheting I’d begin getting sharp pains and after 10-15 minutes, I just couldn’t continue. This led to me crocheting in very small spurts and not overly looking forward to it. I did manage to slowly make progress, but each sleeve took a month.

Part 2 - Purple Crocheted Cardigan

Part 2 

I began getting quite stressed about the delay to part two of my post which unfortunately Checka heard all about! After getting fed up with my moaning she kindly treated me to some new crochet hooks with much more ergonomic handles.

Crocheted cardigan in progress

I was quite overwhelmed, to be honest, crochet has helped me so much until this point because it was the only body part that didn’t hurt! Pain slowing me down had been really hard to cope with. As soon as my new hooks arrived I got to work again, completing the final piece of a sleeve, hem and beginning the hood. 

Front of Purple Crocheted summer cardigan

With a better hook, this yarn began to work up even quicker than before too. The Infinity Hearts Rose 8/4 yarn is gorgeous to work with and the colour still amazes me. I’m a little sad not to be working with this yarn any longer. I am however very pleased to be adding this cardigan to my wardrobe! Originally meant to be a summer cardigan, it is one I can see me wearing year round too.

Back of Purple Crocheted Summer Cardigan

So what do you think of the completed purple crocheted summer cardigan?

Purple Crocheted Summer Cardigan – Part 1

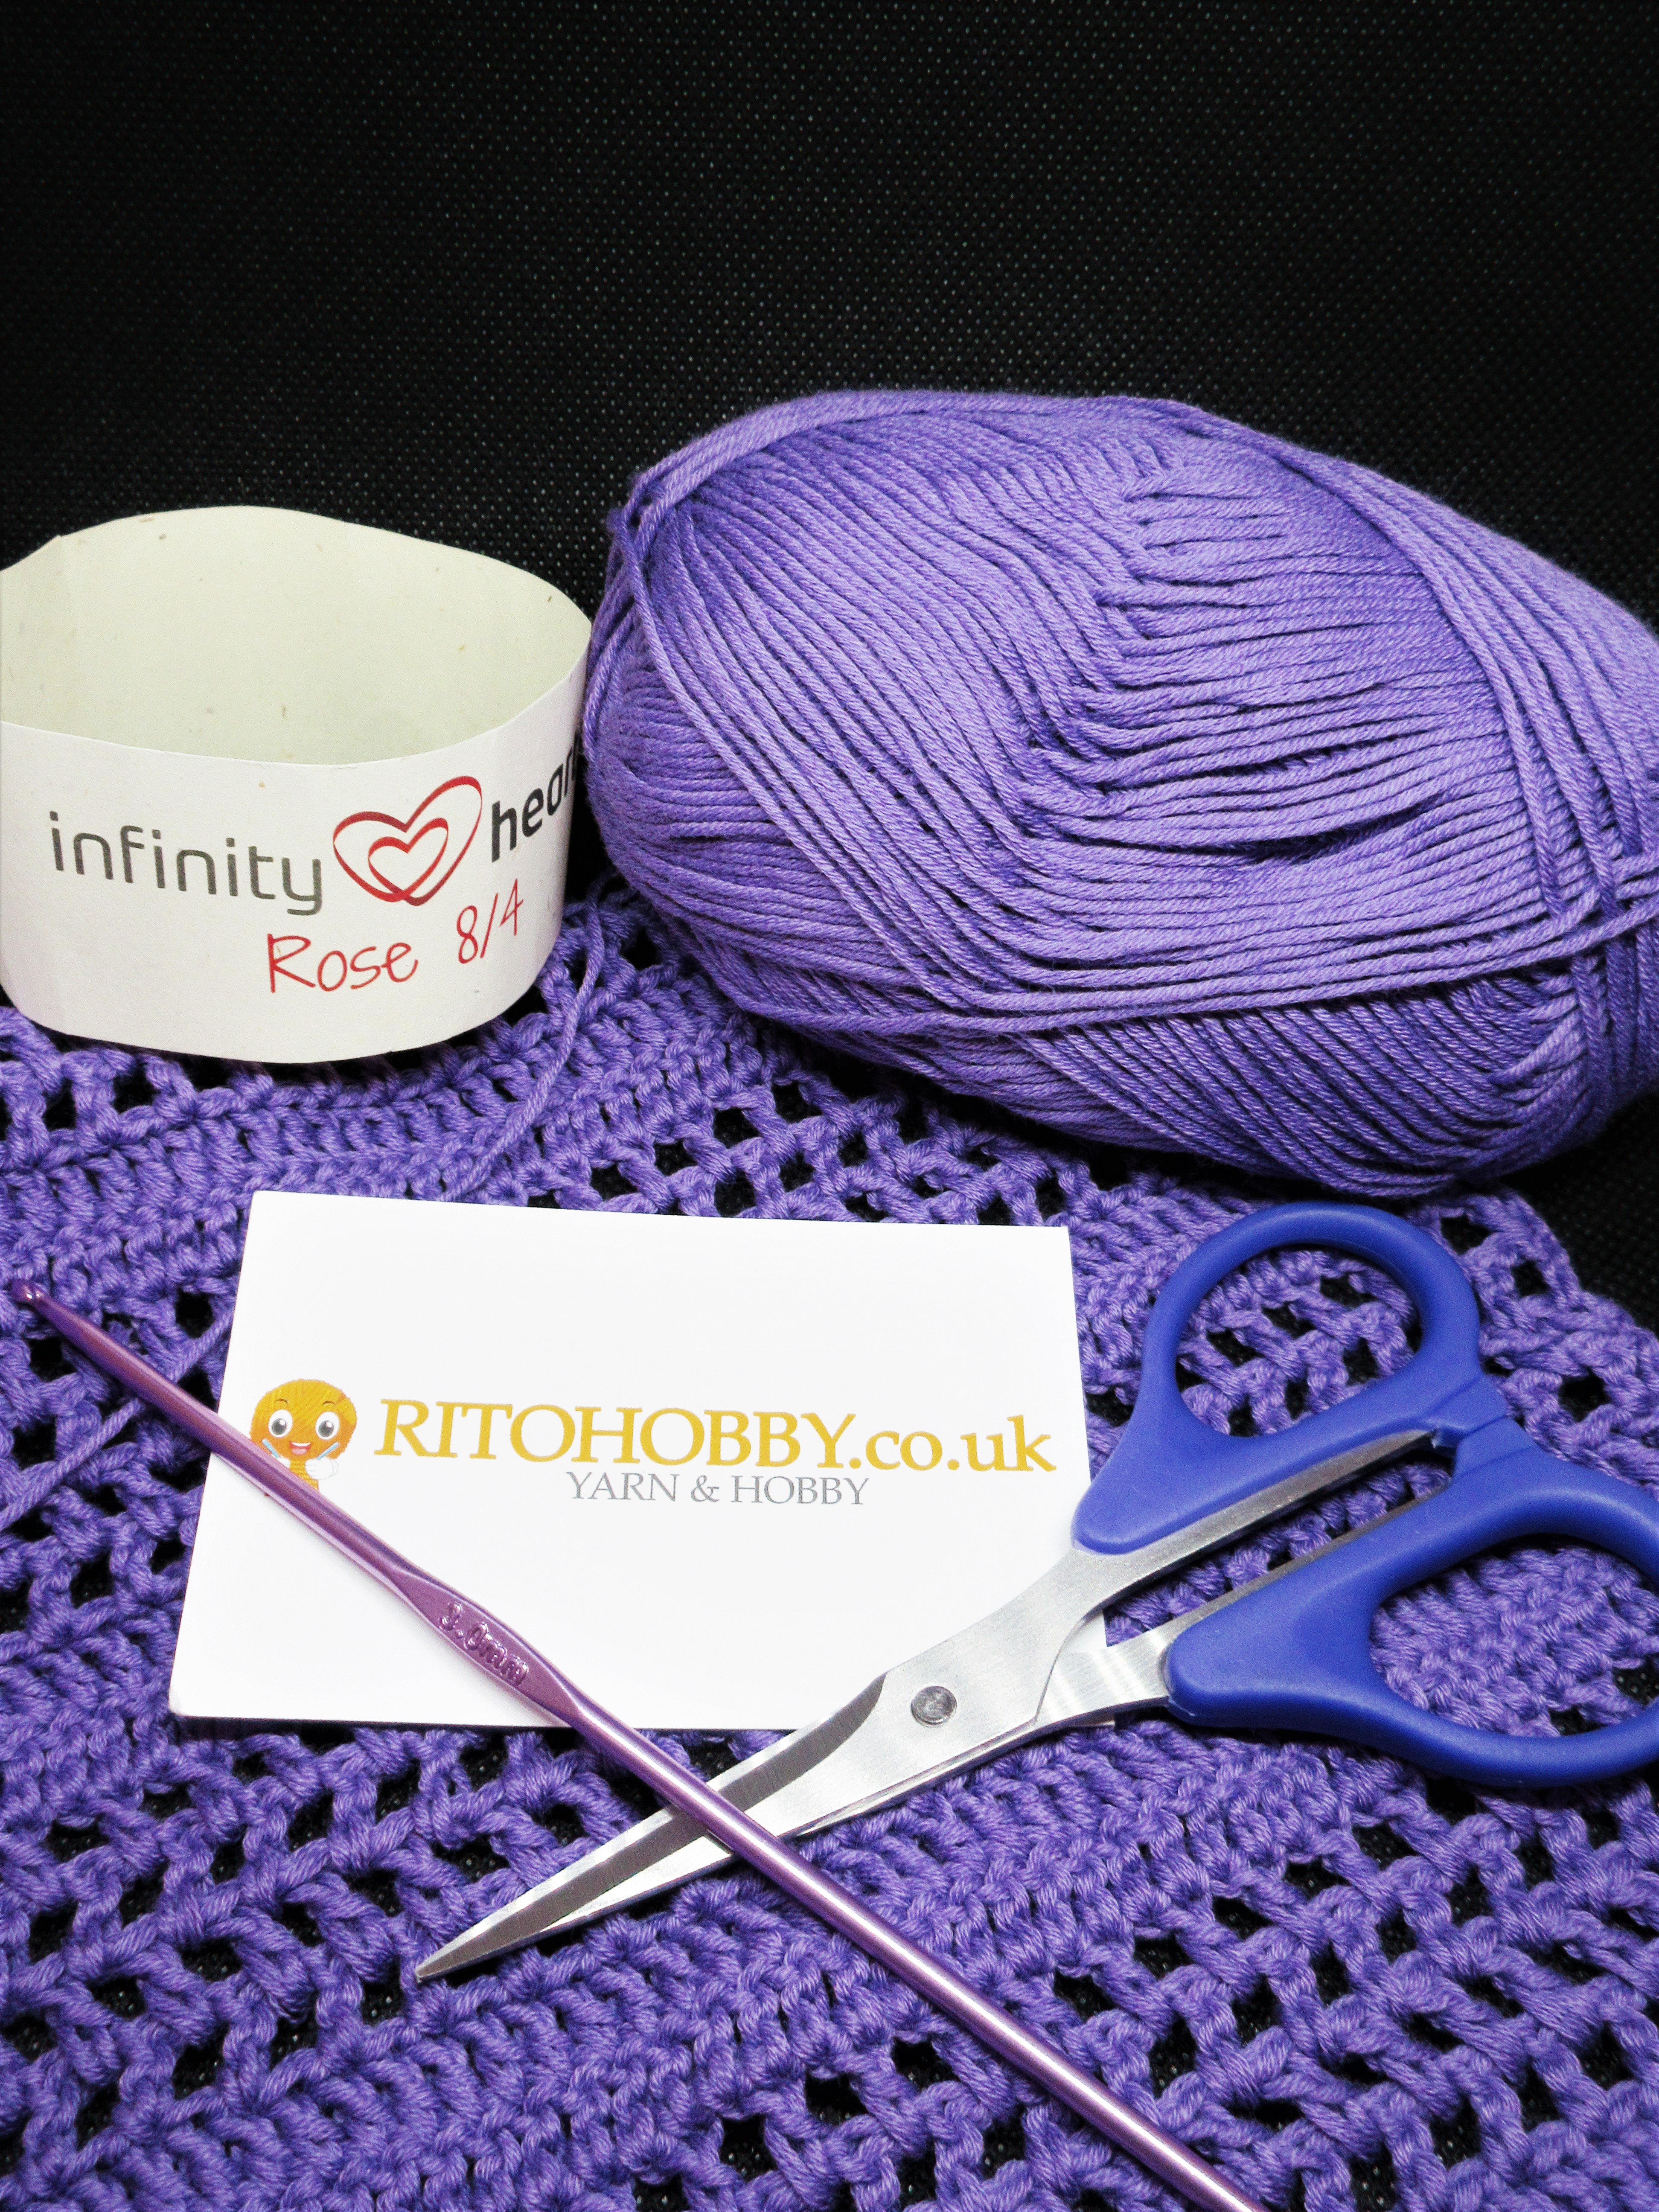
I’ve been creating a purple crocheted summer cardigan using yarn from Ritohobby. Summer may be over but this purple crocheted summer cardigan will be perfect for next year. Ritohobby is a Danish company supplying yarn & hobby products who have recently launched in the UK too.

Infinity Hearts Rose 8/4 yarn

I was sent the gorgeous Infinity Hearts Rose 8/4 yarn in purple to try out. This yarn is 100% cotton, it’s much thinner than the yarn I used for Eva’s Rainbow Unicorn Hoody. I was looking for yarn more like this for that project so I will be ordering more soon! The shade of purple I received is gorgeous and will look lovely with the outfit I wanted to team it with (Jean shorts and a vest top).

Infinity Hearts Rose 8/4 Yarn from Ritohobby

Purple Crocheted Summer Cardigan

As always, this project is taking longer than expected, forgetting that the summer holidays meant a lot more tidying! Creating the design myself using stitches I already know, I’ve worked on it over the summer and slowly getting close to finishing. I’m hoping to work much quicker with Izzy starting school tomorrow!

I wanted something light but warm, living near a river means even on the hottest days we can sometimes get quite a breeze. Whilst summer is over, this will be great for indoors on those warmer days.

Purple crocheted summer cardigan

I’m pleased with how this yarn works up, it looks lovely and feels lovely. I decided on a pattern I liked the idea of and got started. Similar to Eva’s rainbow unicorn hoody, the main body is worked as one piece until the armholes. I wear a size 8-10 cardigan so this is the sizing I’m going with.

Progress So Far

Whilst I have been slow with this project, the end is nearing! I just have a front panel, sleeves, hood & hem to complete. I’m really happy with how this is turning out and I absolutely love the Infinity hearts rose 8/4 yarn from Ritohobby. I will definitely be a regular customer with Ritohobby!

Purple Crocheted Summer Cardigan


What do you think so far? Have you heard of Ritohobby before?